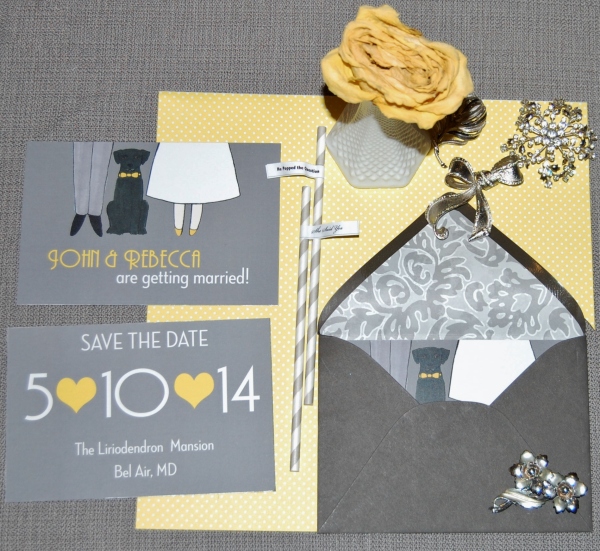
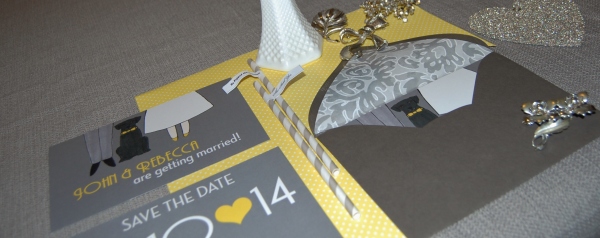
I know there has been a lot of talk about our Save the Dates the past few weeks around here, but I promise this is the last post. A big thank you to all of our friends & family and your very sweet compliments regarding the recent arrivals to your mailboxes. It was so nice to see them the past few days. I just wanted to show you guys what all the hype was about and give you a BIG reveal of our design…from the card to the beautifully lined envelopes and everything in between.
All posts in category Wedding Paper
Save the Date, the BIG Reveal
Posted by soontobemrschadwick on August 5, 2013
https://soontobemrschadwick.wordpress.com/2013/08/05/save-the-date-the-big-reveal/
Wedding Paper, Part IV
In my opinion the crowning glory of your wedding stationary is not only the pretty calligraphy (see my post about that here) its also about the stamps. My new blog post is up on the Baltimore Bride! And it’s all about the perfect stamp for your perfect invitation!
Lots of really great tips! Check it out here!
Posted by soontobemrschadwick on June 14, 2013
https://soontobemrschadwick.wordpress.com/2013/06/14/wedding-paper-partiv/
Wedding Paper, Part III
Okay, so I like many brides spend countless hours dreaming of lofty pinspired DIY projects. More often than not I have fallen prey to how simple these project seem. I march into the local craft store with all this enthusiasm and excitement to only end up frustrated and with at least $50 missing from my checking account. I’m pretty sure the future husband is real close to demanding a cease fire on all the DIY, but he has been pretty awesome and supportive through it all so far (which is one of the million reasons I love him so much).
Most recently, the DIY du jour was the DIY envelope liners that I alluded to last week here. Lucky for us this DIY was not only super simple but, it ended up being a fun project for the two of us. Here’s how we did it:
1. Get the goods. You will need: the right size envelope liner template (love these from Paper Source), patterned paper of your choice (1 sheet per envelope), a pen, a pair of scissors, double sided tape. If you gather all your supplies in advance, you will save yourself a lot of time. Double check that you have enough patterned paper for all of your envelopes, so you don’t have to pause mid-project. A lesson we had to learn the hard way because we ran out, not fun.
2. Trace the appropriate envelope liner template depending on the size of your envelopes onto each back side of the sheet of patterned paper. Or, if you are feeling brave stack a few up. We did like 4 at a time and it worked out just fine and saved us a lot of time.
3. Use your scissors to cut out the envelope liners.
4. Once you have all the envelope liners cut out place each one inside the envelope and fold the flap down to crease the envelope liner.
5. Remove the liner from the envelope and place your double sided tape on the top of each side of the rectangle portion and then on the sides of the triangle portion as well as on the rounded tip. Smooth to secure. Repeat on all of your envelopes.
Stand back and look at the beauty that is your envelopes! Enjoy!
Posted by soontobemrschadwick on May 16, 2013
https://soontobemrschadwick.wordpress.com/2013/05/16/wedding-paper-part-iii/
Wedding Paper, Part II
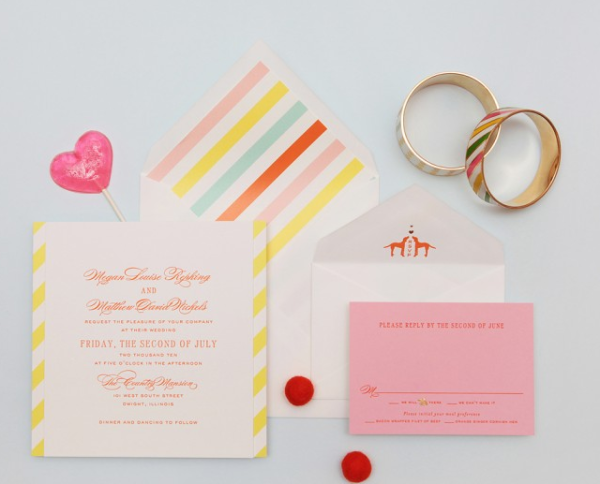
I wasn’t initially planning on doing a blog series on wedding paper…but let’s be honest what’s not to love about the beautiful stationary that is wedding. So, I decided to keep our conversation about fonts, artsy, vintage, and all things paper alive. Today we are going to look at just how beautiful envelope liners really are and why it’s worth the extra effort if you’re DIYing.
Let’s take a looksy at just how pretty it is…
the perfect pop of color
just a touch of whimsy
the city skyline setting the tone
I knew that envelope liners were absolutely necessary after browsing through the beautiful work of Cheree Berry Paper. Then after reading Cheree Berry’s bio it all made sense. She was an associate art director at kate spade in New York City, that’s why it was love at first sight. My mild obsession with kate spade has been prevalent for years now and of course it would inspire the wedding in some way. And here it is…in paper! Next week I am going to walk you through just how easy it is to DIY envelope liners, so stay tuned.
Posted by soontobemrschadwick on May 8, 2013
https://soontobemrschadwick.wordpress.com/2013/05/08/wedding-paper-part-ii/
Wedding Paper, Part I
I have been dying to begin the wedding paper process! As a crafty DIYer this is probably one of the most fun aspects of the planning process for me. I love fonts, I love artsy, I love vintage, I love playing with paper! I love details! We are going for an Art Deco inspired feel because our venue looks like it it straight off the set of The Great Gatsby, so that has set the tone for some of our choices. Speaking of fonts check out some of the contenders for our wedding stationary:
The whole process actually kind of began coincidentally, I went into Michael’s for supplies for my DIY Elva Fields Inspired Statement Necklace and low and behold a paper sale! Woot! I bought up everything they had that in an art deco/whimsical print in gray and yellow for 16 cents a piece. I was stoked and so was Mr. Chadwick (any time I save any money he is excited), which finally gave me the reasoning to purchase Paper Source’s envelope liner templates. I have been staring at them online for way too long. Before I couldn’t justify buying them just because but, now that I have them I know I am going to find a million uses for them. First off, our Save the Dates!
Our Save the Dates are coming along nicely, we have been working with the lovely Jordan Grace Owens on our custom portrait, mentioned here and it’s almost complete. We are going to feature a sneak peak of the portrait in the Save the Date and unveil it on our invites and the rest of our fun wedding paper goods. Yay!
I have played around with so many fonts, layouts, designs…lucky for me Chadwick will indulge me with some input. I definitely think he underestimates his artistic eye because his input has greatly improved the overall design. Plus, he has helped me stay focused, which can be quite the task.
So hopefully the Save the Dates will be getting mailed out relatively soon :)
Posted by soontobemrschadwick on May 3, 2013
https://soontobemrschadwick.wordpress.com/2013/05/03/wedding-paper/
Custom Portraits
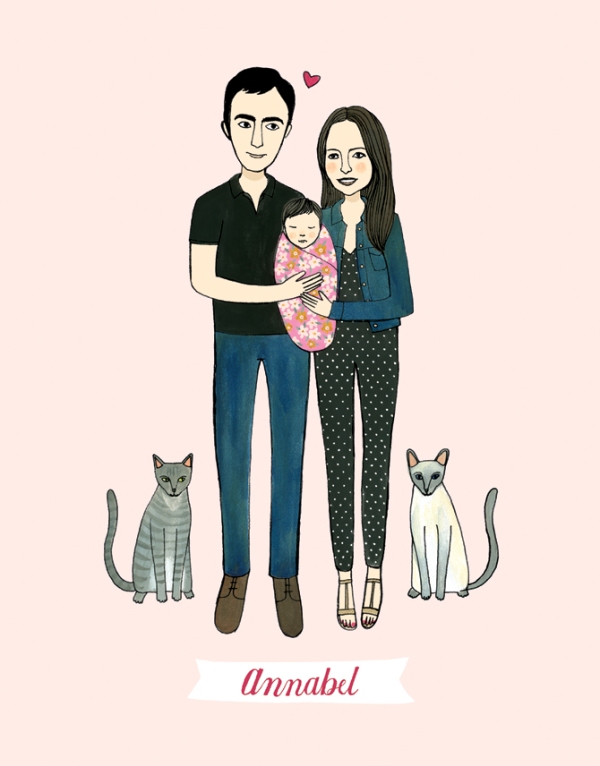
I was fully anticipating keeping this a secret or at least only telling a few people but, let’s be real…I can’t keep a secret to save my life. Mr. Chadwick and I are commissioning a custom portrait! Okay so I know that sounds a little weird…well let’s be honest I’m a little weird, haha but bare with me. While the idea of getting custom portraits done may seem a little bizzaro, I can’t even begin to tell you how excited I am about this! I discovered this artist, Jordan Grace Owens umm years ago and I have been dreaming up an opportunity to commission a portrait ever since. So, I have decided that the opportunity is now! I can’t wait to see it!
Why I Love the Artist
Jordan Grace Owens is an artist & illustrator currently based in Charlottesville, VA. Her work ranges from tiny movable paper dolls to prints to large-scale acrylics. And when she’s not creating artwork in her cozy studio, she teaches drawing and painting classes for children! AWESOMENESS!
A lot of themes in Jordan’s work tend to derive from her affection for early- to mid-century style, art, music, film and design.
I really love Jordan’s use of vivid colors, and her simple but bold graphics.
Jordan offers a range of prints, paper dolls, totes and magnets via her Etsy shop. And for more on Jordan, check out her website.
Posted by soontobemrschadwick on March 11, 2013
https://soontobemrschadwick.wordpress.com/2013/03/11/custom-portraits/


