Wedding Make-Up

I’m no good with make-up.  I’m lucky if I have concealer and mascara on…every once in a while I try to push myself and wear lipstick, but that’s not very often.  My first make-up trial isn’t until August so, I have plenty of time to make-up my mind (ba-dum-pump chsh). But, I honestly have no idea what to do for the BIG day.  I’ve been trying to source some inspiration from the million wedding photos online, but nothing has really sparked my interest.  Plus, our wedding will be in the morning, so I don’t want it to be too over the top for our daytime soiree.

Like I have mentioned before our venue has greatly set the tone of our wedding so, one thought was to incorporate some of the 1920s make-up trends.  Maybe- lips painted in the shape of a cupid’s bow, kohl-rimmed rounded eyes, or bright cheeks brushed with bright red blush.  But, at the same time I don’t want to appear like I’m an extra on the set of The Great Gatsby.  The beauty of make-up being stylized over time, is that we can take it, tweak it, and interpret it to fit a more modern look.

So, through all of the “research” I’ve done here are some of the looks that have got me thinking:

1 2 3 4 5


DIY or Buy?

The wedding dress…I NEVER, NEVER…EVER thought I would be DIYing my wedding dress.  But, after going to several bridal boutiques and just not finding the right dress…I finally said yes to my Mom’s dress albeit with a bit of a DIY element.  Obviously I am not going to be able to go at this project alone so, I have enlisted the help of a professional.  However, I still consider this a DIY project because believe it or not if you are going to be embarking on this journey you are INVOLVED! Much more involved than I originally anticipated, but I have been loving every second of it!

The design has been a work in progress…and I feel like every time I meet with our dressmaker it gets better.  This past Saturday my Mom and I went for another fitting and it is just coming along beautifully.  I am so excited! I can already tell this is going to be one of my most adored elements of our BIG day!

So, in my experience this was a definite DIY.  I think it goes without saying that it is a very personal choice.  However, I will say it’s important to make sure you are open to options that you may not have thought were for you…because they may be better than you could have ever imagined.

Here’s a little sneak peek of the dress…

skirt

Save the Date, the BIG Reveal

I know there has been a lot of talk about our Save the Dates the past few weeks around here, but I promise this is the last post.  A big thank you to all of our friends & family and your very sweet compliments regarding the recent arrivals to your mailboxes.  It was so nice to see them the past few days.  I just wanted to show you guys what all the hype was about and give you a BIG reveal of our design…from the card to the beautifully lined envelopes and everything in between.

Save the Dates, 1

Save the Dates, 2

Save the Dates, 3

Save the Date, Quick Tip

We dropped our Save the Dates off at the post office yesterday, YAY! When I was on my way out of my office headed out to the post office, I was chatting with one of my lovely co-workers who shared a great tip with me…so I wanted to share it with you.

I was fully attending on just dropping off the Save the Dates with a smile and a thank you.  Boy was I wrong… you do not want to use the automatic sorter for your precious wedding stationary.  You can easily have the post office weigh your Save the Date or invitation and verify that you have the correct postage and then opt to stamp on the postmark yourself, its called hand cancelling. This will eliminate the necessity for the envelope to go through a machine that often results in some damage to the invitation (at least some sort of crease), and always leaves machine marks and creases on the beautified envelope that was electronically addressed in a illustrative font or tastefully addressed by a hand calligrapher.  Just make sure when hand cancelling that you get the postmark on each stamp and then you are all set.  These are all of our lovely guests’ Save the Dates looking sharp with their postmarks (and their addresses blurred out).

std - Copy

It only took me like 5 minutes and it provided me with so much relief.  Lucky for me there won’t be any nightmares of the automated machine destroying all of my hard work.  DIY wedding stationary is a labor of love and it is definitely not worth risking!

Save the Date, Inspiration

While we are working on a few finishing touches, the Save the Dates will soon be going off in the mail.  Yay! I am so excited!  So much so that I can’t wait until they arrive in our friends’ & family’s mailboxes. I had to do a little breakdown of the inspiration with you to hold me over until they arrive.

Let’s start off with a confession: I AM OBSESSED WITH SUBTLE DETAILS.  I can’t help it.  Any opportunity I had to customize this little piece of mail I did, luckily with lots of patience and help from the Mr.

First things first, the custom portrait (more info on that here).  My inspiration was this invite that I saw on Style Me Pretty.

pevan_invites_003$!600x

I loved the idea! I just knew that I couldn’t create it personally so, I immediately thought of an artist I had been following for a few years, Jordan Grace Owens.  Once we started the process it went from a simple sketch to being much more detailed and involved portrait, shocker (sarcasm).  Jordan was awesome and I am so happy with how it came out.  The Save the Date doesn’t feature the entire portrait, but our guests will get to see a glimpse.  The grand reveal will be in our wedding invitation :)

After we finalized the portrait I concentrated on font choices. Here are some of the front runners. Then the layout and design.

Then printing…while the printing process wasn’t necessarily inspired.  I wanted to share with you our experience so, that if you were thinking of using the same printer you wouldn’t make the same mistake I did.  We were trying to be budget conscious and got lucky enough (or so we thought) to stumble upon a Groupon for VistaPrint. So, that is where we decided to get them printed.  We uploaded the design and waited for them to arrive in the mail.  When they came in mail I was beyond excited to open the box up and get my hands on them.  They looked just as I imagined and I was so happy.  That is until I realized they were the wrong size.  They didn’t fit into the envelopes we had worked on for weeks with the pretty liners and everything.  My heart sank…I got a little bridezilla I’m not going to lie.  Vistaprint advertised these as 5X7 but, they were in fact 4.61 x 7.17, which is why they didn’t fit.  Fine print, essh.  It just so happened that the way I navigated the Vistaprint site, it wasn’t visible to a normal person with imperfect vision. Word to the wise: if you are planning to use VistaPrint for any invitations start here that way you can actually see the correct sizing.  I found this after the fact.  Anyway, I called and spoke with VistaPrint on the phone for over an hour.  It wasn’t pleasant.   They were rude, I was rude, and they refused to refund my Groupon or replace the incorrectly sized Save the Dates. They did however, refund what I paid over the value of the Groupon and then I called it a day.  The following day I called Groupon and they refunded me the cost of the Groupon because of how poor the customer service was at VistaPrint. There is a God! Lol! I was so relieved. After all that the Save the Dates were FREE… FREE=GOOD!  How’s that for budget conscious?! Yay! Instead of tossing them we decided to cut the Save the Dates down to fit our envelopes. While the edging’s finish wasn’t as pretty as I had hoped, it worked…

However, I of course couldn’t leave them that way.  I was focused on how I could get the edges a little more refined and probably like 6 weeks later I found this.  Gilded edges, I don’t think it gets more refined than that.  While gold doesn’t fit our color scheme, silver certainly does.  With one quick trip to Michael’s for the silver leaf paint pen and maybe like 20 minutes updating the edges, I was able to give out the sigh of relief I had been looking for for over a month.

IMAGE-6_LeafingInvites_550

One word: BRILLIANT! I couldn’t finally let it go and move on.  And get a little more sleep.

Then of course we slipped them into our pretty lined envelopes addressed by our calligrapher and pimped out in our vintage stamps.  Now, they are all set for the mailman. So keep an eye out family & friends.  They will be coming soon.

Upcycled Vintage Wedding Dress 101

This weekend Mom & I had our first consultation with the dressmaker.  We learned a lot about upcycling Mom’s dress! So, I thought I would share some of the insights she provided to us with you.

1. Turn off the Lights.  

First things first, light is the enemy…when you have a dress that has been locked up in the dark (attic) for 40 years, you shouldn’t carelessly expose it to mass amounts of light.  It will yellow the dress at an exponential rate, so be careful.  I was not aware of this, so I am so glad Carol shared this with us.

2. Box it Up.

Hanging it in your closet is not a good idea.  In my case the dress is 40 years old, its fragile.  Hanging it up could really damage the shoulders, also something I didn’t think of.  Carol suggested getting a big coat box and secure the dress inside with acid-free tissue paper between layers of fabric.

3. Work with What You Got.

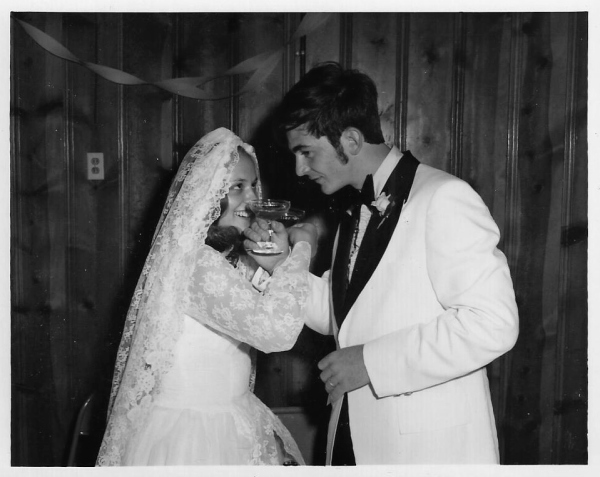
In my case Mom’s dress is made of a beautiful Chantilly lace, which is a very fine airy lace, usually with lots of detail and elaborate motifs.  Lucky for me Chantilly pairs quite nicely with other airy fabrics like tulle, more on that here.  It is my personal favorite out of all the laces :) So, with that in mind I want to use every square inch of the lace in good condition.  We have come up with ways to not only include in the dress but, other places as well.

Also, I was hoping to do a corset back but, the fabric in the bodice is not quite strong enough.  Instead of going ahead with a corset and risking tearing the front bodice we have come up with a new plan to preserve the pretty.

4. Be Prepared.

Come with sketches of what you want to do, if you can.  If you are not very artistic chances are you know someone that is, a simple sketch will really only take a few minutes.  Also, bring photos of other dresses with the same elements you want to incorporate in your dress.  That way the dressmaker knows what type of finished look you are going for.  A picture is really worth a thousand words.  While I will say being prepared is important, I must also say so is being open-minded…

5. Be Open-minded.

Without being too repetitive, see here. I can’t stress the importance of being open-minded during the planning process.  You will save yourself a lot of stress.  But, when considering upcycling there will be things you can’t do, things you didn’t know you could do, and maybe somethings you will have to do to make it work.  If you can let go a little bit , it can be the things you don’t expect that will make you the most happy.  Anyone who knows me, knows that I am a planner and can have a tough time being open-minded with something I have spent a lot of time preparing for…but, I can honestly admit sometimes you are just wrong.  Our dressmaker had a lot of great recommendations based upon the originality of my Mom’s dress and in some cases the condition.  Surprisingly to me, I loved all of them.  And I am so excited to see the finished product… the anticipation just might kill me.

Here’s some upcylced vintage wedding dress inspiration to dull the pain of anticipation

Wedding Paper, Part IV

In my opinion the crowning glory of your wedding stationary is not only the pretty calligraphy (see my post about that here) its also about the stamps.  My new blog post is up on the Baltimore Bride! And it’s all about the perfect stamp for your perfect invitation!

stamps

Lots of really great tips! Check it out here!

2013-06-14_1626

Say Yes to the Dress, UPDATED

Ok, so I know I told you I found my dress, but I have had a change of heart.  The dress that I had found with the help of the dress whisperer Randy is gorgeous and I love it but, there was just something missing.  I think that is one of the reasons I felt like I had to sleep on it.  I was originally super excited about the many alterations I had planned for the dress because it would really make it unique.  However, I kept have these nightmares of like a Frankenstein dress and I just couldn’t do it.

Here we are months later and I am still searching.  This past Saturday Mom and I had another appointment.  The ladies were so nice and the dresses were beautiful, they were just for a different bride. The more I try on dresses the more I realize how impossible it is to find what I want without many costly alterations, err Frankenstein dress nightmares…

After thinking about it I realized if I was going to invest in numerous alterations it wasn’t going to be on an off the rack dress.  It was going to be on my Mom’s dress, which is honestly something I never thought I would say.  I was even stubbornly resistant to trying Mom’s dress on at all.  I was just concerned that I would try it on and not like it and she would lay the Ruth smackdown of pressure on for me to wear it on my BIG day.  We all know she is a force to be reckoned with, where do you think I got it from. Lol!  But, something happened when I slipped it on.  I fell in love! I fell in love with the history, with the meaning, with the lace, with the veil.  There are so many elements of my Mom’s dress that I absolutely love.  The lace.  I mean shut the front door its insanely beautiful.  I also love that it has sleeves.  So many dresses today are strapless.  I am also obsessed with the cathedral veil, which is the last thing I thought I would love.  I was planning on going with a tiny birdcage and here I am starring at myself in the mirror in this regal cathedral veil with a life of its own and loving every second of it!

For those of you that haven’t seen my Mom’s dress here she is with Dad looking amazing on her BIG day:

Scan0001 (2)

I decided to get to work researching local dressmakers. I found  Carol’s Custom Dressmaking in New Windsor.  If anyone has worked with her please leave a comment with your experience.  I have read a few reviews online and most of them are really positive, so I felt comfortable setting up a consultation.  If I can get all of the updates done within my budget this is going to be what I wear on my BIG day too, so wish me luck!

Wedding Paper, Part III

Okay, so I like many brides spend countless hours dreaming of lofty pinspired DIY projects.  More often than not I have fallen prey to how simple these project seem.  I march into the local craft store with all this enthusiasm and excitement to only end up frustrated and with at least $50 missing from my checking account.  I’m pretty sure the future husband is real close to demanding a cease fire on all the DIY, but he has been pretty awesome and supportive through it all so far (which is one of the million reasons I love him so much).

Most recently, the DIY du jour was the DIY envelope liners that I alluded to last week here.  Lucky for us this DIY was not only super simple but, it ended up being a fun project for the two of us.  Here’s how we did it:

envelopelinersDIY

1. Get the goods. You will need: the right size envelope liner template (love these from Paper Source), patterned paper of your choice (1 sheet per envelope), a pen, a pair of scissors, double sided tape.  If you gather all your supplies in advance, you will save yourself a lot of time.  Double check that you have enough patterned paper for all of your envelopes, so you don’t have to pause mid-project.  A lesson we had to learn the hard way because we ran out, not fun.

2. Trace the appropriate envelope liner template depending on the size of your envelopes onto each back side of the sheet of patterned paper.  Or, if you are feeling brave stack a few up.  We did like 4 at a time and it worked out just fine and saved us a lot of time.

3. Use your scissors to cut out the envelope liners.

4. Once you have all the envelope liners cut out place each one inside the envelope and fold the flap down to crease the envelope liner.

5. Remove the liner from the envelope and place your double sided tape on the top of each side of the rectangle portion and then on the sides of the triangle portion as well as on the rounded tip. Smooth to secure. Repeat on all of your envelopes.

Stand back and look at the beauty that is your envelopes! Enjoy!

Wedding Paper, Part II

I wasn’t  initially planning on doing a blog series on wedding paper…but let’s be honest what’s not to love about the beautiful stationary that is wedding.  So, I decided to keep our conversation about fonts, artsy, vintage, and all things paper alive.  Today we are going to look at just how beautiful envelope liners really are and why it’s worth the extra effort if you’re DIYing.

Let’s take a looksy at just how pretty it is…

the perfect pop of color

liner3

just a touch of whimsy

liner2

 the city skyline setting the tone

liner1

I knew that envelope liners were absolutely necessary after browsing through the beautiful work of Cheree Berry Paper. Then after reading Cheree Berry’s bio it all made sense.  She was an associate art director at kate spade in New York City, that’s why it was love at first sight.  My mild obsession with kate spade has been prevalent for years now and of course it would inspire the wedding in some way.  And here it is…in paper! Next week I am going to walk you through just how easy it is to DIY envelope liners, so stay tuned.

Inspiring Photos Forever

Inspiring People

pretty little loser 22

After my 105 pound weight loss, I started this blog to inspire and motivate others to live a healthy lifestyle!

MeridianBride

DIY Wedding Invitations For Your Perfect Day

The Sparkly Blog

FOR ALL OF LIFE'S SPARKLY MOMENTS

whimsy and whit

"She lets her imagination run away with her"